

How To Make An Automatic Pumpkin Farm In Minecraft
In Minecraft, you tin can build pretty much anything. From giant bases to automated farms, nothing is impossible. In terms of farms, the automatic melon and pumpkin farm is a simple contraption. Seeds will grow in front of an observer. When melons and pumpkins are fully grown, a piston will push button them down into a hopper, which volition empty into a chest.
This farm design is completely automatic; afterward yous build it, just sit back and watch the farm get to work! In this guide, nosotros're going to look testify you footstep by step how to build an automatic melon and pumpkin farm.
Where To Observe Melon And Pumpkin Seeds
Prior to building this farm, you will need to take some pumpkin and melon seeds.
Pumpkins can be found in pretty much every biome, as long equally there is grass. Additionally, they tin can abound on top of snowfall, and so you can find pumpkins in mount and taiga biomes.
When looking for a pumpkin, search effectually plains and mountain areas.Trees will non be dense here, and then the pumpkins will be easy to spot from a distance.
Melons are a scrap more hard to find. They can be plant naturally in jungle biomes, also as savannah villages and woodland mansions. To quickly find a melon, effort locating a village. If a hamlet has a farming area, they may be planted hither.
After finding pumpkins and melons, you will exist able to craft seeds from each. Open your crafting carte, and you should be able to turn each into their given seed.
Materials Needed For A Melon And Pumpkin Subcontract

Now that y'all have your seeds, let's accept a await at all the materials needed to build this farm.
- 1 hopper minecart
- 10 glass
- 1 chest
- ane hopper
- 1 redstone block
- 1 redstone dust
- 3 powered rails
- 3 dirt blocks (and a hoe to till the dirt)
- 2 observers
- one piston
- ane bucket of h2o
- ane pumpkin seed
- 1 melon seed
- 11 edifice blocks (any cake of your selection)
Steps To Brand Your Automatic Melon And Pumpkin Farm
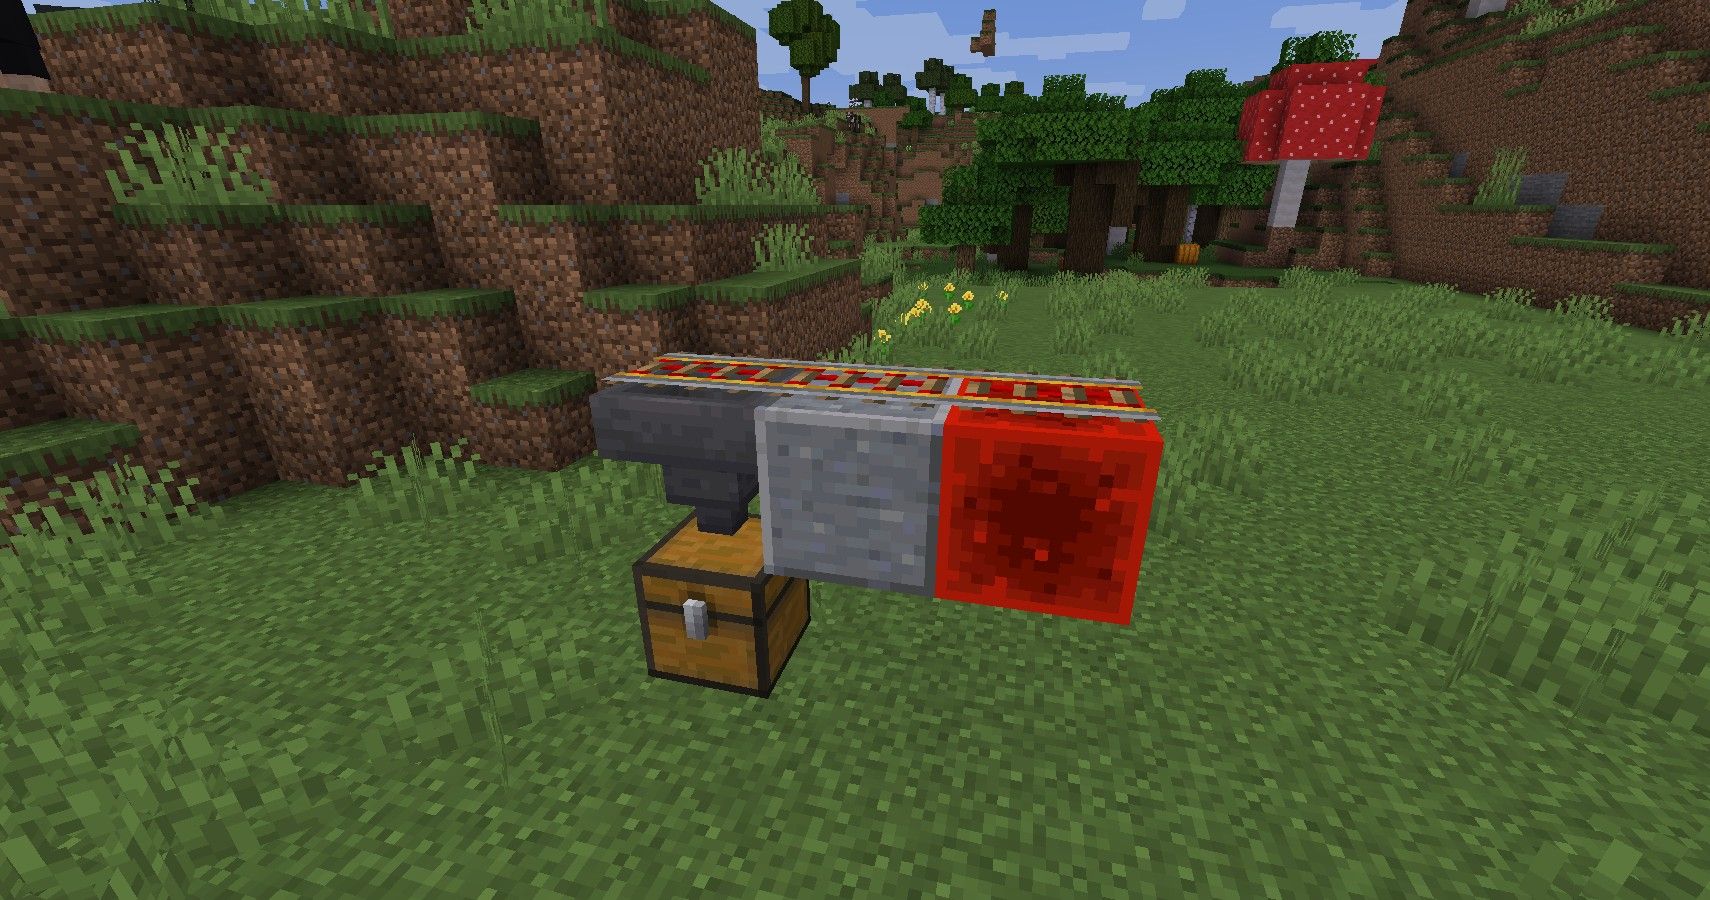
To first this build, place a chest on the basis, with a hopper attached to the top. To do this, but press shift while attaching the hopper and so the chest won't open up.
Adjacent to the hopper, place a building block and a redstone cake. You should take a 3x1 build.
Place a powered rail on superlative of each block. Recollect to press shift again when placing on top of the hopper.
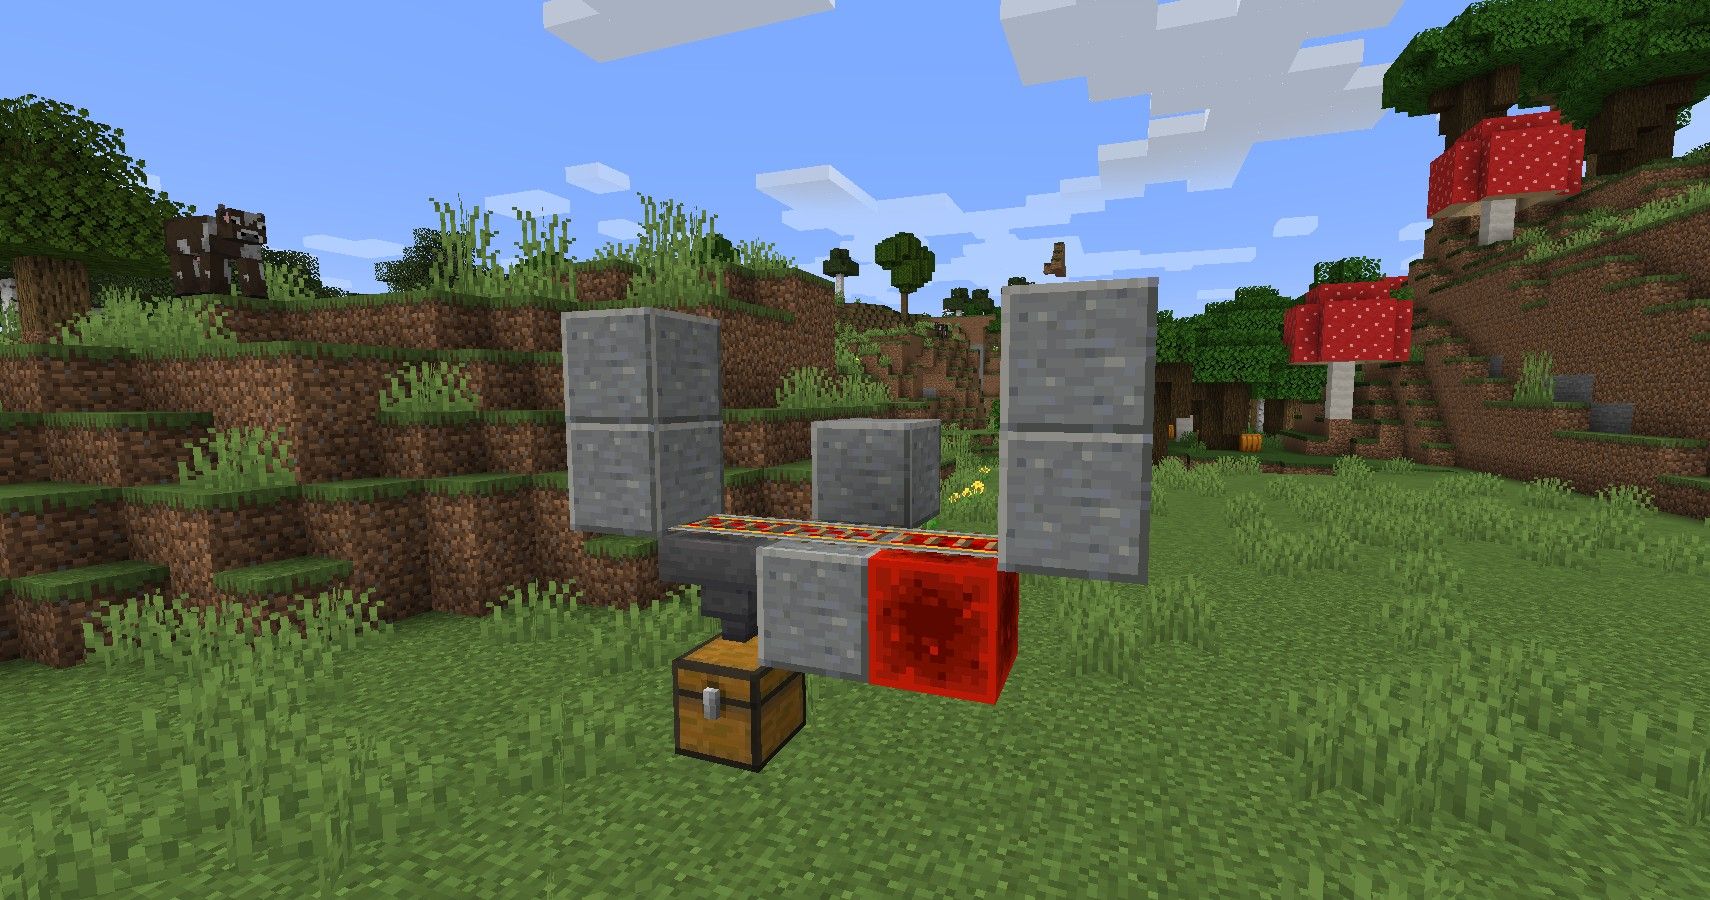
On either border of the powered rail rails, place two building blocks.
Apply one boosted building block on the back, center edge of the build. Above, you can see the setup of these edifice blocks.
Betwixt the two top blocks, identify 3 dirt blocks. They should be directly over the track below.
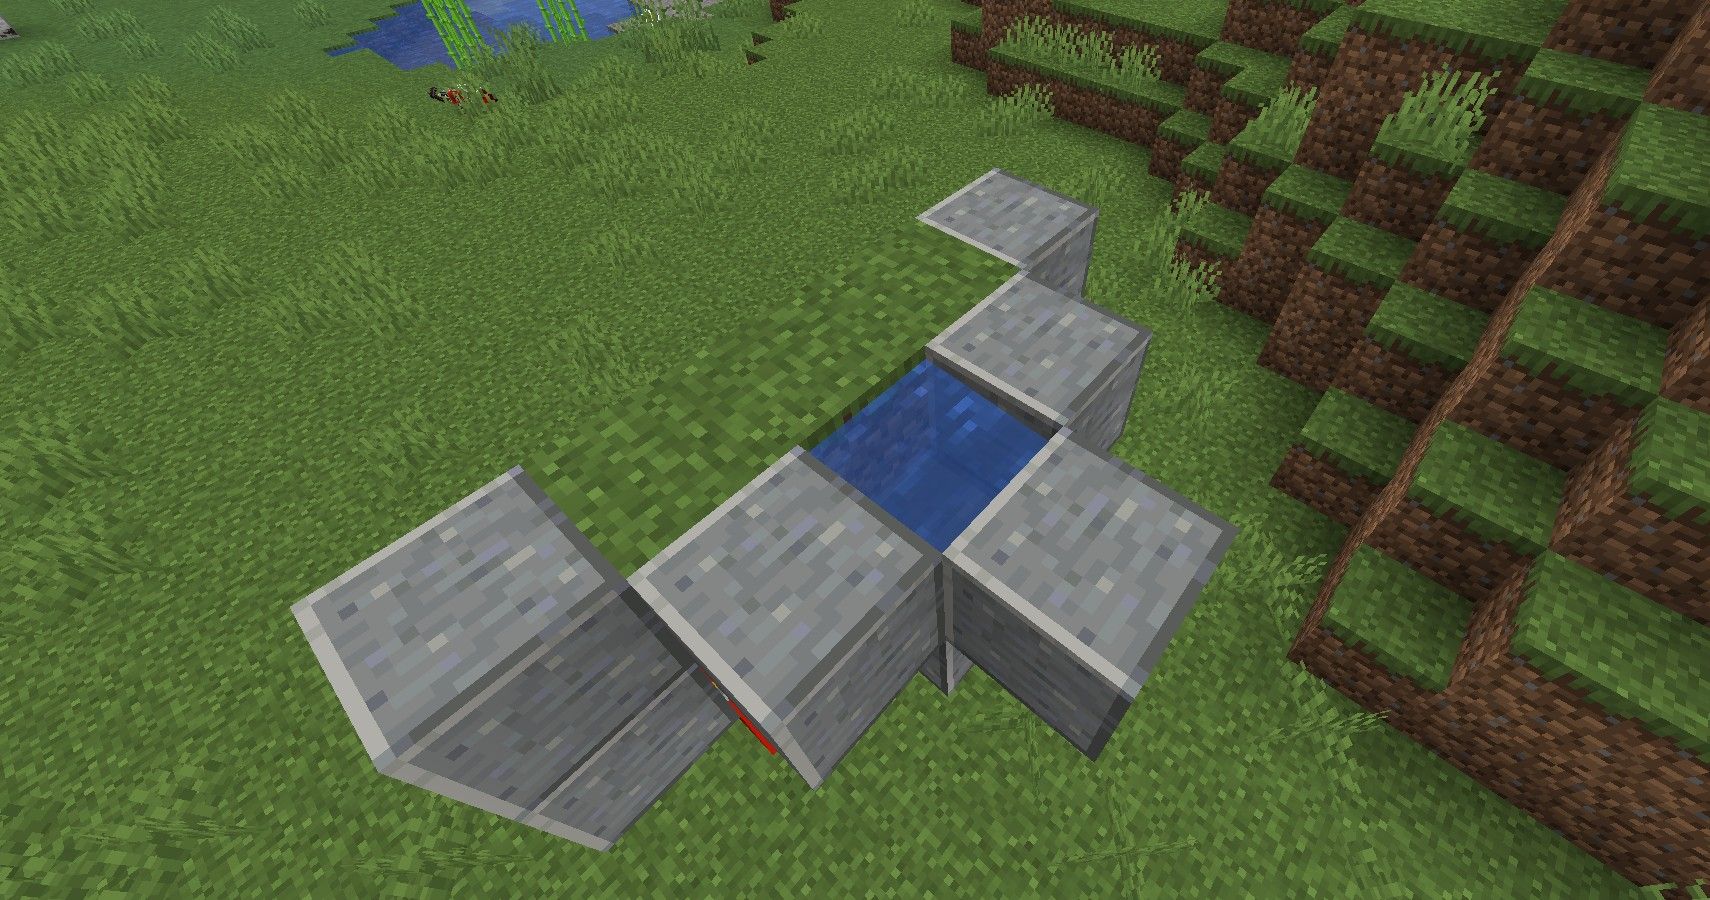
With the dirt in place, adhere 2 building blocks on either side, with a tertiary cake attached at the corners.
Overall, you should accept a 'hole' formed with the blocks. Place your water in this hole. This will be the water source for the pumpkins and melons to grow.

On the building blocks next to the dirt, place two observers.
Then, identify a piston directly in the center, above the water. Getting these blocks to face the right way can exist a fleck catchy, so feel free to utilise whatever temporary foundation blocks.
Behind the piston, identify redstone dust, and then two edifice blocks directly backside each observer.
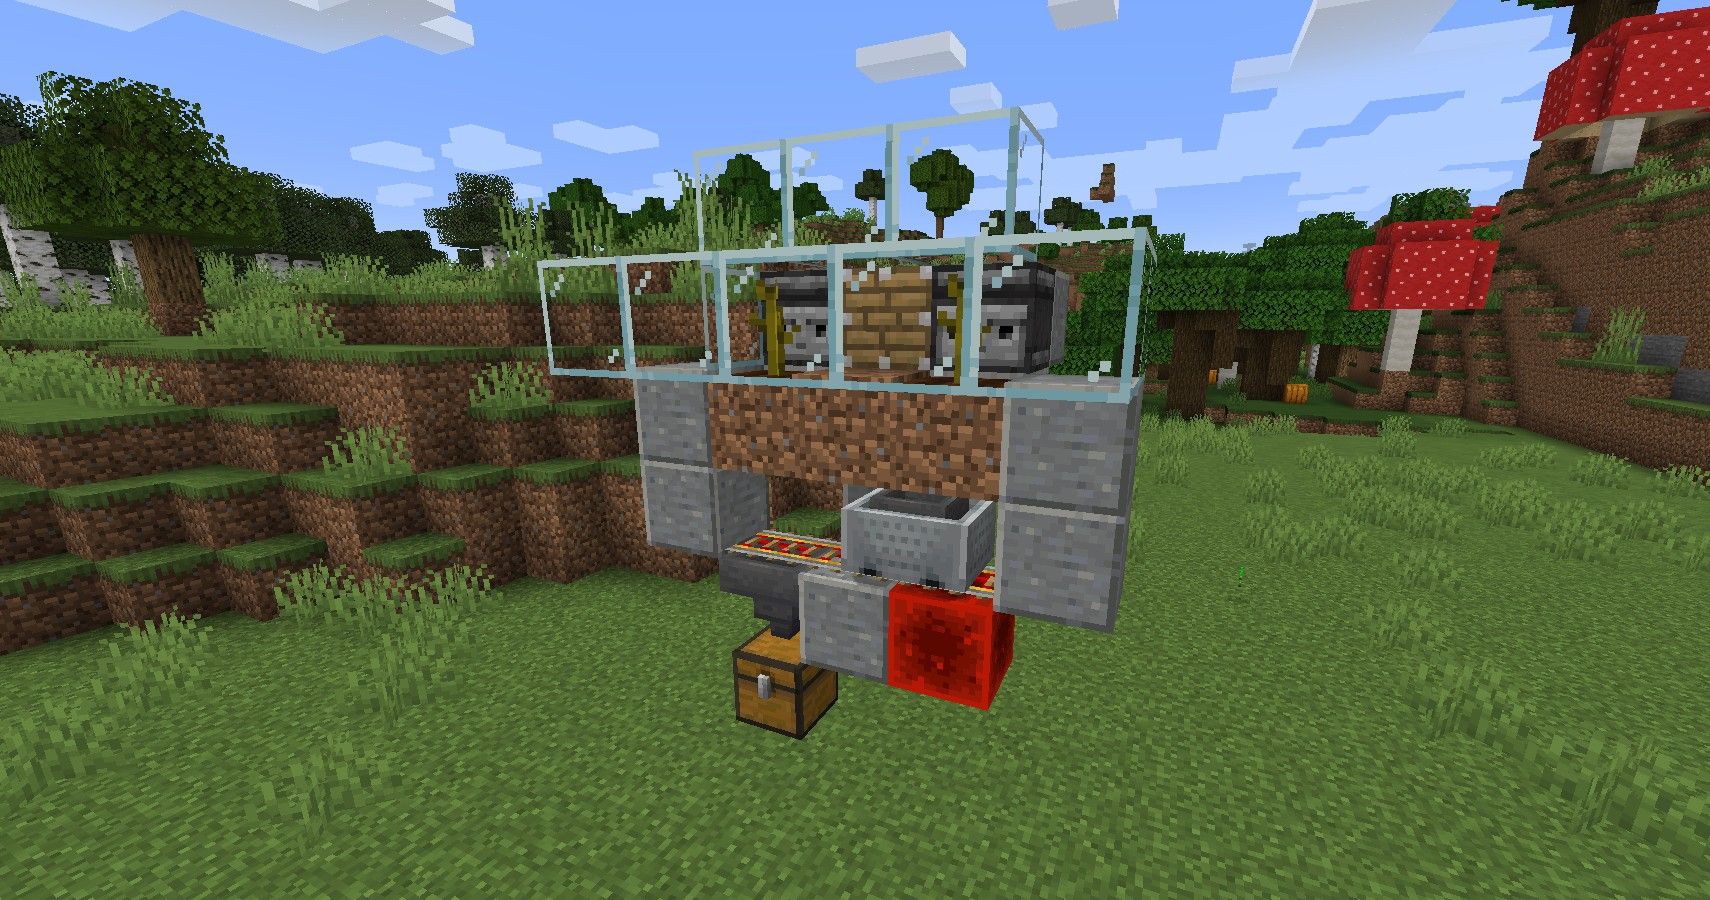
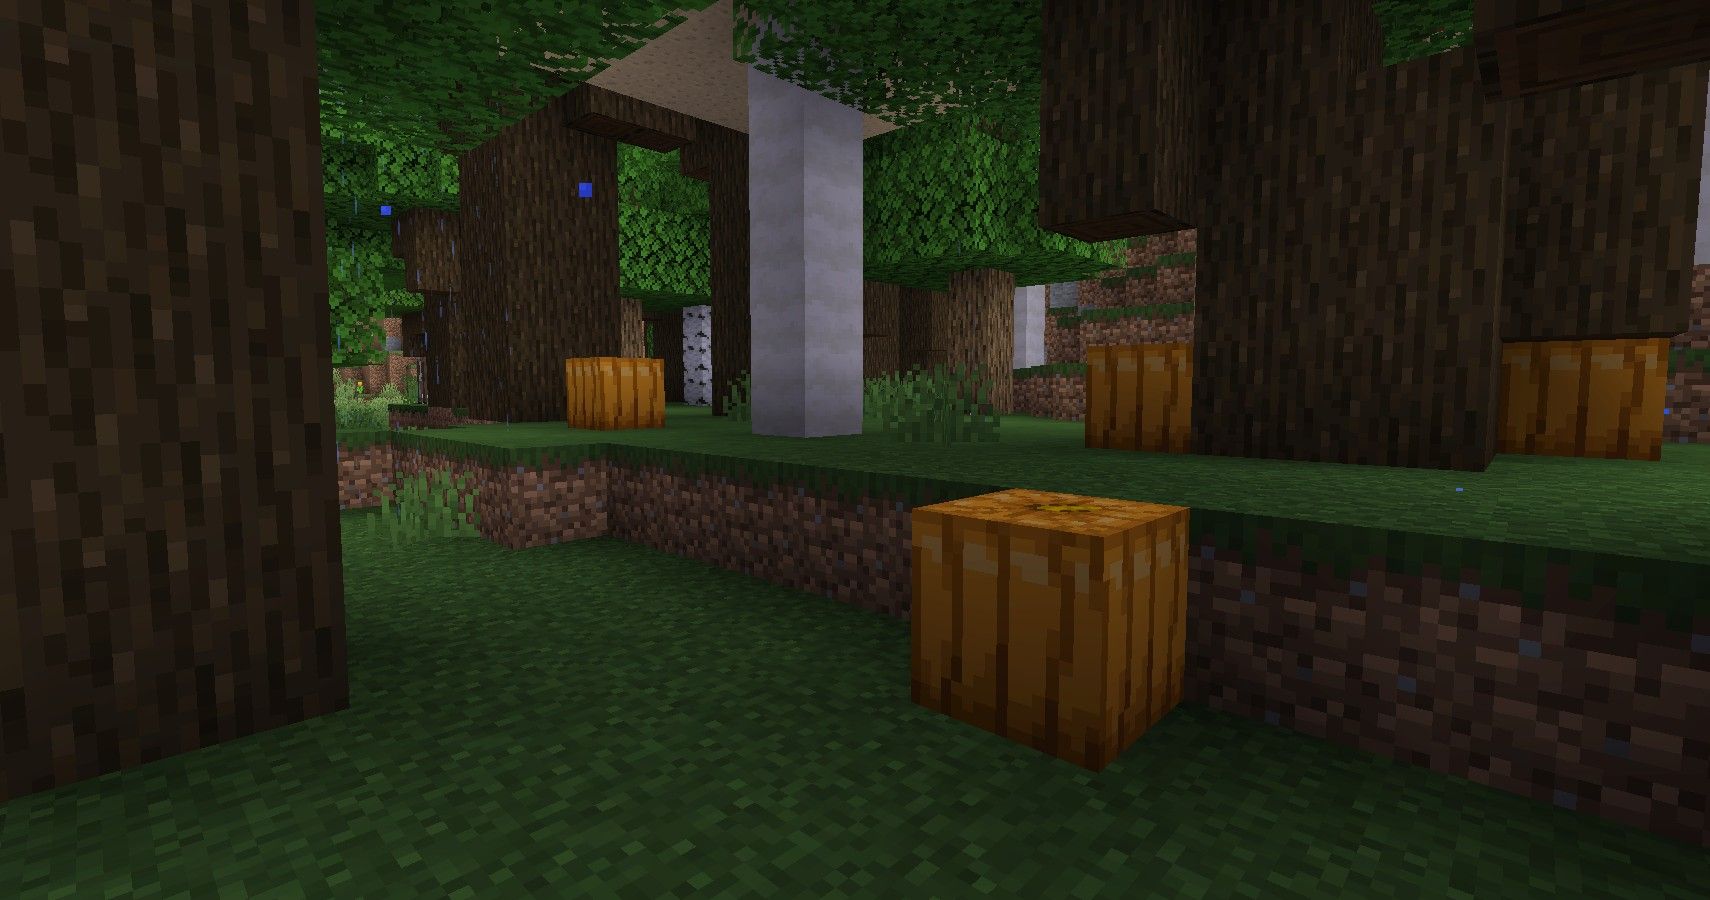
On the 2 edge pieces of dirt in front of the observers, till the ground and place your seeds. This example uses one of each, however, you tin can merely two of the same seed if you adopt.
Afterward the seeds are planted, enclose the growing area in glass. This will prevent the grown melon and pumpkins from flying out of the farm.
Lastly, just place your hopper minecart on the powered rails! The minecart will bounce back and forth until information technology is removed. If y'all don't want the subcontract to constantly run, simply remove the minecart.
You can likewise adhere a lever or button to plough the rails off. Check out our complete guide on how to utilize redstone for this.
Your automatic melon and pumpkin farm is now complete!
Tips For Farming Efficiency
This farm tin easily be expanded by repeating the pattern. Instead of placing a 3x1 foundation, you can increase this to your desired size. The powered rail should expand every bit long as the farm.
Remember, the pumpkins and melons will but grow if you are nearby, so be sure to add this near your base for the all-time production rates.
As mentioned earlier, yous can also use this farm to produce just one type of material. For case, if y'all aren't planning on using melon, yous can set this subcontract to only produce pumpkin.
This subcontract volition but work for these ii items because of the way that they grow. Other fruits and vegetables abound directly out of the footing and require a new seed after each harvest. Pumpkins and melons crave a space next to the seed, however, the seed will create an infinite number of resources.
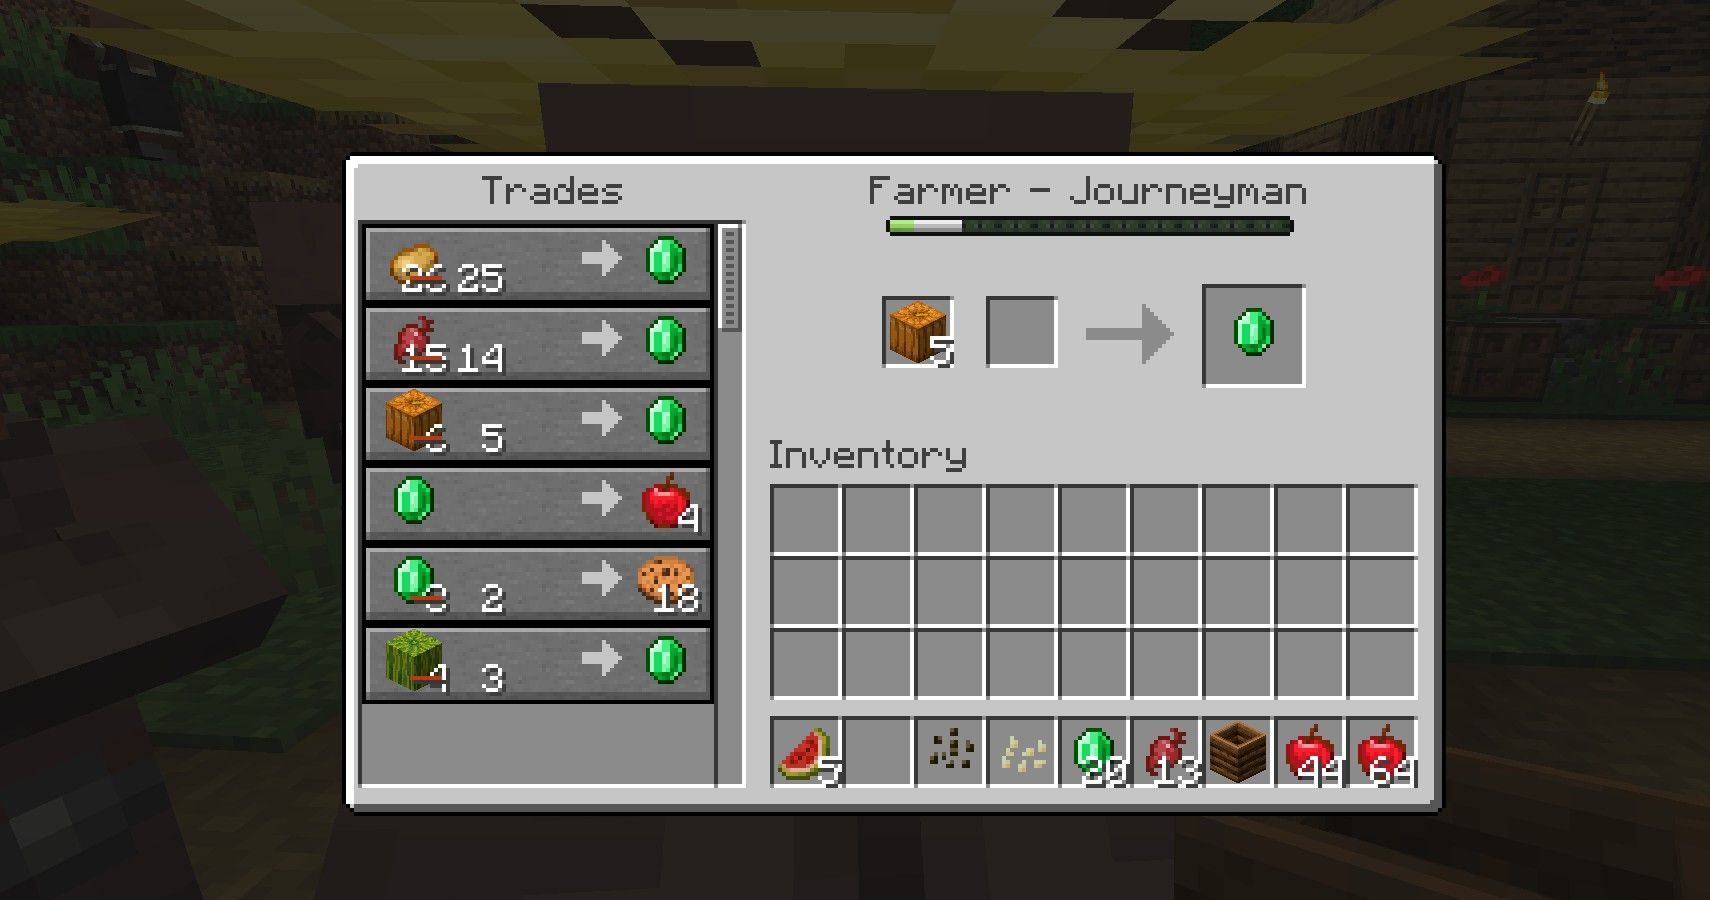
The pumpkins and melons that you will receive from the subcontract can be traded with villagers also. A villager with the farming profession will buy half-dozen pumpkins for an emerald, and four melons for an emerald. This is a swell way to make emeralds without doing too much work.
At present that you have congenital this automatic pumpkin and melon farm, be sure to check out automatic farms that are essential for your Minecraft base!

How To Make An Automatic Pumpkin Farm In Minecraft,
Source: https://www.thegamer.com/minecraft-automatic-melon-pumpkin-farm-guide/
Posted by: blaisdellprifid.blogspot.com
0 Response to "How To Make An Automatic Pumpkin Farm In Minecraft"
Post a Comment